Filter by
Results found for “Manual setting and NC programming is needless torture for machine operators…”

Mounting pillar
The Mounting pillar is used for mounting the measurement optics to the machine under test.
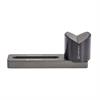
Ø25 mm x 25 mm V-magnet with base and M8 thread
This AINiCo V-magnet is ideal for holding cylindrical parts made from ferrous materials. It is recommended for use on CMMs and the Equator™ gauging system.
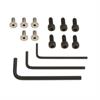
A-9920-0430 - XR20 fixings kit
A-9920-0430 XR20 fixings kit A complete set of screws and allen keys for the XR20 mounting ring and chuck adaptor assembly.
PICS connection
PICS connection PICS interface configuration If PHC10-3 PLUS is to be used in a PICS linked system, the PPOFF configuration is selected using switch 7.
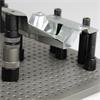
Ø19 mm x 25 mm magnet with M6 thread
This AlNiCo magnet is ideal for holding ferrous parts and is very hard wearing. It is recommended for use on CMMs, the Equator™ gauging system, and vision and multi-sensor machines.

MP4 probe
MP4 tool setting probe
REVO-2 general information
REVO-2 general information CAUTION: If it is necessary to return any part of the system please ensure it is packaged carefully.

A-5555-2430 - M5 cube with angle, titanium, DS 75 mm, for ZEISS applications
M5 cube with angle.
RESOLUTE™ true-absolute linear and rotary (angle) encoder with Siemens DRIVE-CLiQ interface
Siemens DRIVE-CLiQ is the innovative, powerful communications interface to connect encoder and direct measurement systems with SINUMERIK and SINAMICS drive components.
Appendix 3 - Multiple Renishaw probe type installations
Appendix 3 - Multiple Renishaw probe type installations For installations using SP600M and other Renishaw probing systems, Renishaw has developed the IS1-2 interface selector system.

DMG DMC55 Machine
picture of DMG machine for use on joint open house micro-site

PH20 5-axis touch-trigger measurement system
PH20 is another innovative measurement product from Renishaw that transforms co-ordinate measuring machine (CMM) performance.

A-5555-3877 - M3 clamping stylus XXT Ø3 mm silicon nitride ball, carbon fibre stem, L 20 mm, ML 11 mm, for ZEISS applications
A-5555-3877 M3 clamping stylus XXT Ø3 mm silicon nitride ball, carbon fibre stem, L 20 mm, ML 11 mm, for ZEISS applications M3 clamping stylus XXT thermostable.

A-5555-2445 - M3 clamping stylus XXT Ø3 mm silicon nitride ball, carbon fibre stem, L 30 mm, ML 21 mm, for ZEISS applications
A-5555-2445 M3 clamping stylus XXT Ø3 mm silicon nitride ball, carbon fibre stem, L 30 mm, ML 21 mm, for ZEISS applications M3 clamping stylus XXT thermostable.

A-5555-3880 - M3 1/4 star stylus, Ø3 mm silicon nitride ball, carbon fibre stem, ML 11 mm, for ZEISS applications
A-5555-3880 M3 1/4 star stylus, Ø3 mm silicon nitride ball, carbon fibre stem, ML 11 mm, for ZEISS applications M3 1/4 star stylus XXT thermostable. Note: measurement length is to end of ball.

A-5555-3881 - M3 1/4 star stylus, Ø3 mm silicon nitride ball, carbon fibre stem, ML 21 mm, for ZEISS applications
A-5555-3881 M3 1/4 star stylus, Ø3 mm silicon nitride ball, carbon fibre stem, ML 21 mm, for ZEISS applications M3 1/4 star stylus XXT thermostable. Note: measurement length is to end of ball.

A-5555-3901 - M3 1/4 star stylus, Ø3 mm silicon nitride ball, carbon fibre stem, ML 31 mm, for ZEISS applications
A-5555-3901 M3 1/4 star stylus, Ø3 mm silicon nitride ball, carbon fibre stem, ML 31 mm, for ZEISS applications M3 1/4 star stylus XXT thermostable. Note: measurement length is to end of ball.
NCSI non-contact scanning interface
The NCSI non-contact scanning interface is used in conjunction with NC4, NC4+ or NC4+ Blue non contact tool setters.

A-5555-2033 - M3 reference stylus XXT Ø5 mm ruby ball, carbon fibre stem, L 30 mm, ML 21 mm, for ZEISS applications
A-5555-2033 M3 reference stylus XXT Ø5 mm ruby ball, carbon fibre stem, L 30 mm, ML 21 mm, for ZEISS applications M3 reference stylus XXT (red dot). Note: measurment length is to end of ball.
Automatic operation
Automatic operation This section gives a suggested method for datuming an ACR2 autochange rack port and the recommended CMM movements for change cycles using that datum position.

A-5555-0231 - M5 stainless steel holder for digitilisation styli, L 119 mm, for ZEISS applications
A-5555-0231 M5 stainless steel holder for digitilisation styli, L 119 mm, for ZEISS applications M5 stylus holder.
Dynamate AB - Scania - where machine tool maintenance is an investment, not a cost!
Dynamate AB, the plant maintenance company for world leading truck manufacturer Scania, has implemented one of the most comprehensive and well-structured maintenance strategies in it's industry.

OMP60 probe system
OMP60 - optical machine probe. Installation and user's guide. H-2000-5221 (Probe 1 only) which is the old IG has been superseded by A-4038-8505-02A (Probe 1-3)

Ballbar Trace software with QC20 ballbar
Flexible software for time-based QC20 ballbar data capture, extending use to 5-axis machine verification.
Aquasub Engineering - Pump manufacturer extends the life of their machine tools and reduces downtime by 10%
The Renishaw QC20-W ballbar system is widely recognised as a preventative maintenance tool for new and installed machines.

Aquasub Engineering - Pump manufacturer extends the life of their machine tools and reduces downtime by 10%
The Renishaw QC20-W ballbar system is widely recognised as a preventative maintenance tool for new and installed machines.
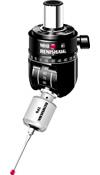
MH8
MH8 manual indexing probe head
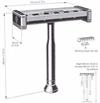
MAP stand
MAP manual autojoint probe stand

MAPS
MAP manual autojoint probe stand
Correlative Raman microscopy with the Correlate™ software module
Correlate™ enables the comparison of Raman results with many commonly used microscopy systems including SEM, fluorescence, AFM, Infra-red and optical microscopes

HPPA
HPPA, High Precision Pull-down Arm, provides cost effective tool setting for turning centres.
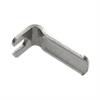
M-5000-3541 - TP2-6W spanner
The TP2-6W spanner is used for attaching styli to the TP2-6W probe. This product must be used whenever TP2-6W styli are changed.
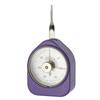
P-GA01-0001 - Trigger force gauge
The trigger force gauge is used when requalifying the probe configuration and checking the measurement performance of the probe after any adjustment has been made to the trigger force.
PHC10-3 Probe Head Controller
PHC10-3 Probe Head Controller Powering the PHC10-3 The PH10-3 head controller is to be used with the provided PSU - (Emerson DP4024N3M AC power adptor).
Sempre joins Renishaw Channel Partner Programme
Renishaw, one of the world’s leading precision engineering and scientific technology companies, has announced the appointment of The Sempre Group — the Gloucestershire, UK-based industrial metrology...
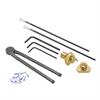
Tool kit for Renishaw NC4
This tool kit is used for installing and maintaining the probe a NC4

Non-contact portfolio
Document comparing specifications for obsolete NC1 product and new NC3 and NC4 products.
The accuracy of rotary encoders
Many automation systems rely on precision rotary motion, such as rotary format computer-to-plate (CTP) pre-press machines, machine tool A, B C axes, surface mount machines and wafer handling and...
Employee perspectives
Here, you will find Renishaw employees from around the world talking about their journey into engineering, their experience at Renishaw and current industry perspectives.
MH8 product compliance
MH8 product compliance Contact Renishaw plc or visit www.
TP7 product compliance
TP7 product compliance Contact Renishaw plc or visit www.
Touch-trigger probe systems product compliance
Touch-trigger probe systems product compliance Contact Renishaw plc or visit www.
Retrofit cabinet product compliance
Retrofit cabinet product compliance Contact Renishaw plc or visit www.
PH6M product compliance
PH6M product compliance Contact Renishaw plc or visit www.
RTP20 product compliance
RTP20 product compliance Contact Renishaw plc or visit www.
TP20 product compliance
TP20 product compliance Contact Renishaw plc or visit www.
TP8 product compliance
TP8 product compliance Contact Renishaw plc or visit www.
Raman spectroscopy news
Systems and components for Raman and photoluminescence spectroscopy.

A-5555-0108 - Stylus for holder, Ø0.3 mm ruby ball, tungsten carbide stem, L 15.3 mm , ML 2.3 mm, for ZEISS applications
A-5555-0108 Stylus for holder, Ø0.3 mm ruby ball, tungsten carbide stem, L 15.3 mm , ML 2.3 mm, for ZEISS applications Threadless stylus for holder.

A-5555-0109 - Stylus for holder, Ø0.5 mm ruby ball, tungsten carbide stem, L 15.5 mm , ML 2.5 mm, for ZEISS applications
A-5555-0109 Stylus for holder, Ø0.5 mm ruby ball, tungsten carbide stem, L 15.5 mm , ML 2.5 mm, for ZEISS applications Threadless stylus for holder.