Filter by
Results found for “Manual setting and NC programming is needless torture for machine operators…”

A-5555-3839 - M5 4-way star, Ø1 mm ruby ball, tungsten carbide stem, ML 30 mm, for ZEISS applications
A-5555-3839 M5 4-way star, Ø1 mm ruby ball, tungsten carbide stem, ML 30 mm, for ZEISS applications M5 stylus for thread measurement. Note: measurement length is to end of ball.
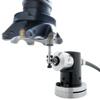
TS27R
TS27R touch probe for tool setting and broken tool detection on machining centres
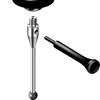
A-5004-7582 - M2 and M3 stylus tool
For M2 and M3 threaded styli.

Metal 3D printing overview
Metal 3D printing is an ideal manufacturing method for many industries and sectors.
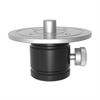
A-9936-0171 - XK tripod mount single
XK tripod mount can be used with a tripod when there is no space to directly mount the launch to the machine structure.
MCG (H-1000-5080)
Renishaw’s machine checking gauge (MCG) provides an easy way to monitor the volumetric measurement performance of your co-ordinate measuring machine (CMM).
News and reports
This file is used to denote a News and reports image within Group software. It is for Insite use only.

A-5555-0049 - M5 Ø8 mm ruby ball, ceramic stem, L 63.5 mm, ML 41.5 mm, for ZEISS applications
A-5555-0049 M5 Ø8 mm ruby ball, ceramic stem, L 63.5 mm, ML 41.5 mm, for ZEISS applications M5 straight stylus, for ZEISS applications. Note: measurement length is to end of ball.

A-5555-0051 - M5 Ø8 mm ruby ball, ceramic stem, L 114.5 mm, ML 92.5 mm, for ZEISS applications
A-5555-0051 M5 Ø8 mm ruby ball, ceramic stem, L 114.5 mm, ML 92.5 mm, for ZEISS applications M5 straight stylus, for ZEISS applications. Note: measurement length is to end of ball.

A-5555-0046 - M5 Ø9 mm ruby ball, ceramic stem, L 64.5 mm, ML 42.5 mm, for ZEISS applications
A-5555-0046 M5 Ø9 mm ruby ball, ceramic stem, L 64.5 mm, ML 42.5 mm, for ZEISS applications M5 straight stylus, for ZEISS applications. Note: measurement length is to end of ball.

A-5555-0048 - M5 Ø10 mm ruby ball, ceramic stem, L 65.5 mm, ML 43.5 mm, for ZEISS applications
A-5555-0048 M5 Ø10 mm ruby ball, ceramic stem, L 65.5 mm, ML 43.5 mm, for ZEISS applications M5 straight stylus, for ZEISS applications. Note: measurement length is to end of ball.
Measurement Solutions Ltd joins Renishaw's Channel Partner Programme
Renishaw, one of the world’s leading precision engineering and scientific technology companies, has announced the appointment of Measurement Solutions Ltd (MSL) - the Peterborough, UK-based scanning...
Graduates - Frequently Asked Questions
Below you will find a number of frequently asked questions pertaining to the Renishaw Graduate Scheme..
Automotive
Automotive Additive manufacturing crosses the finishing line Formula Student is Europe's most established educational motorsport competition, bringing together industry leaders, high profile...
Renishaw virtual work experience inspires future engineers
Gloucestershire based global engineering technologies company, Renishaw, has opened applications for its 2021 UK virtual work experience programme and will close them on January 29th.

A-5555-2443 - M8 magnet base for Datum sphere, for Zeiss applications
A-5555-2443 M8 magnet base for Datum sphere, for Zeiss applications M8 base for Datum sphere, for calibration at 45°.

Micrometer
machine tool,manual,inspection
Data acquisition modes
Data acquisition modes The AC3 has six modes (0 to 5) for acquiring measurement data.
FORTiS™ enclosed absolute optical encoder downloads
Download technical literature, media and case studies about the FORTiS enclosed optical encoder series.(data sheets, installation guides, 3D drawings, case studies)
UCC T5 introduction
UCC T5 introduction The UCC T5 is the latest generation Renishaw CMM controller product.
System components overview
System components overview System overview The modular design of the SP25M system enables the flexibility for optimum configuration by the user.
Multi-laser Raman analysis of zirconia
Researchers at the National Research Nuclear University MEPhI (Moscow Engineering Physics Institute), are studying complex oxides.
UCC T5 / UCC S5 and SPA3
UCC T5 / UCC S5 and SPA3 The DMT 'Y' adaptor cable PICS connector must be connected to the PICS connection on the SPA3.
Recruitment evening
Recruitment evening Opening evening details Due to continuing business success we are looking to recruit a further 30 assembly operators for our world-class manufacturing facility near Stroud,...
ADDiVAL selects Renishaw’s RenAM 500Q Ultra system to boost its additive manufacturing processes
ADDiVAL, a start-up specialising in industrial-scale additive manufacturing, has purchased Renishaw's RenAM 500Q Ultra system to boost the mass production of metal components.

SPRINT™ on-machine contact scanning system - Full seminar presentation
Leading machine tool builders, Yamazaki Mazak, and engineering metrology experts, Renishaw, held the “Hitting the mark” seminar at Mazak’s European Headquarters in Worcester, UK.
MCG maintenance
MCG maintenance Care of equipment Renishaw probes and associated systems are precision tools used for obtaining precise measurements and must therefore be treated with care.
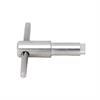
Autojoint key
Autojoint key for manual changing of autojointed Renishaw probes and extensions.
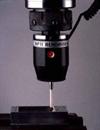
MP11
Hard-wired probe system for manual machines and CNC milling centres.

Lathe cover image
Component inspection and tool setting for turning centres
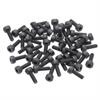
A-9693-0154 - Box of 50 M2 × 6 mm mounting screws for ATOM™ and ATOM DX™ encoder readhead installation
A-9693-0154 Box of 50 M2 × 6 mm mounting screws for ATOM™ and ATOM DX™ encoder readhead installation A box of 50 M2 × 6 mm mounting screws for ATOM and ATOM DX encoder system installation.
PHC10-3 PLUS safety
PHC10-3 PLUS safety If the equipment is used in a manner not specified by the manufacturer, the protection provided by the equipment may be impaired.

Advanced Diagnostic Tool ADTa-100 for absolute encoders
The ADTa-100 is compatible with Renishaw's RESOLUTE™ (marked with an ADT symbol), EVOLUTE™ and FORTiS™ absolute encoders.

Renishaw PH10 / SP25M and modular fixturing contribute to Hope’s quality control process
In 2013, Renishaw produced the world’s first 3D printed metal bicycle frame for UK company, Empire Cycles.
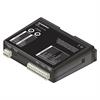
A-5500-1000 - HSI interface
A hard-wired transmission interface that conveys and processes signals between a probe and the machine tool controller.
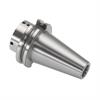
Taper shank: Shank specification ANSI CAT B5.50-1985 (metric pull stud thread), Taper ISO 40
This shank is designed to secure the probe into an ISO 40 taper machine tool spindle. Shank Gauge length is A: 35.00mm (1.378 inches) and it is suitable for OMP40 / OMP400 probes
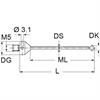
A-5555-0038 - M5 Ø10 mm ruby ball, tungsten carbide stem, L 65.5 mm, ML 52.5 mm, for ZEISS applications
A-5555-0038 M5 Ø10 mm ruby ball, tungsten carbide stem, L 65.5 mm, ML 52.5 mm, for ZEISS applications M5 straight stylus, for ZEISS applications. Note: measurement length is to end of ball.

A-5555-0039 - M5 Ø10 mm ruby ball, tungsten carbide stem, L 65.5 mm, ML 43.5 mm, for ZEISS applications
A-5555-0039 M5 Ø10 mm ruby ball, tungsten carbide stem, L 65.5 mm, ML 43.5 mm, for ZEISS applications M5 straight stylus, for ZEISS applications. Note: measurement length is to end of ball.

A-5555-0805 - M5 Ø5 mm ruby ball, tungsten carbide stem, L 30 mm, ML 20 mm, for ZEISS applications
A-5555-0805 M5 Ø5 mm ruby ball, tungsten carbide stem, L 30 mm, ML 20 mm, for ZEISS applications M5 straight stylus, for ZEISS applications. Note: measurement length is to end of ball.

A-5555-1060 - M5 Ø2 mm ruby ball, tungsten carbide stem, L 30 mm, ML 20 mm, for ZEISS applications
A-5555-1060 M5 Ø2 mm ruby ball, tungsten carbide stem, L 30 mm, ML 20 mm, for ZEISS applications M5 straight stylus, for ZEISS applications. Note: measurement length is to end of ball.

A-5555-1425 - M5 Ø3.5 mm ruby ball, tungsten carbide stem, L 100 mm, ML 85 mm, for ZEISS applications
A-5555-1425 M5 Ø3.5 mm ruby ball, tungsten carbide stem, L 100 mm, ML 85 mm, for ZEISS applications M5 straight stylus, for ZEISS applications. Note: measurement length is to end of ball.

A-5555-1508 - M5 Ø3.5 mm ruby ball, tungsten carbide stem, L 58 mm, ML 48 mm, for ZEISS applications
A-5555-1508 M5 Ø3.5 mm ruby ball, tungsten carbide stem, L 58 mm, ML 48 mm, for ZEISS applications M5 straight stylus, for ZEISS applications. Note: measurement length is to end of ball.

A-5555-1773 - M5 Ø0.5 mm ruby ball, tungsten carbide stem, L 32 mm, ML 12 mm, for ZEISS applications
A-5555-1773 M5 Ø0.5 mm ruby ball, tungsten carbide stem, L 32 mm, ML 12 mm, for ZEISS applications M5 straight stylus, for ZEISS applications. Note: measurement length is to end of ball.

A-5555-2270 - M5 Ø15 mm ceramic ball, tungsten carbide stem, L 118 mm, ML 105 mm, for ZEISS applications
A-5555-2270 M5 Ø15 mm ceramic ball, tungsten carbide stem, L 118 mm, ML 105 mm, for ZEISS applications M5 straight stylus, for ZEISS applications. Note: measurement length is to end of ball.

A-5555-2444 - M5 Ø5 mm ruby ball, tungsten carbide stem, L 34.5 mm, ML 25.5 mm, for ZEISS applications
A-5555-2444 M5 Ø5 mm ruby ball, tungsten carbide stem, L 34.5 mm, ML 25.5 mm, for ZEISS applications M5 straight stylus, for ZEISS applications. Note: measurement length is to end of ball.

A-6560-0504 - M5 Ø8 mm ruby ball, tungsten carbide stem, L 200 mm, ML 175 mm, for ZEISS applications
A-6560-0504 M5 Ø8 mm ruby ball, tungsten carbide stem, L 200 mm, ML 175 mm, for ZEISS applications M5 straight stylus, for ZEISS applications. Note: measurement length is to end of ball.

A-5555-0067 - M5 Ø2.5 mm ruby ball, tungsten carbide stem, L 55 mm, ML 5 mm, for ZEISS applications
A-5555-0067 M5 Ø2.5 mm ruby ball, tungsten carbide stem, L 55 mm, ML 5 mm, for ZEISS applications M5 straight stylus, for ZEISS applications. Note: measurement length is to end of ball.

A-5555-0946 - M5 Ø8 mm ruby ball, tungsten carbide stem, L 150 mm, ML 137 mm, for ZEISS applications
A-5555-0946 M5 Ø8 mm ruby ball, tungsten carbide stem, L 150 mm, ML 137 mm, for ZEISS applications M5 straight stylus, for ZEISS applications. Note: measurement length is to end of ball.

A-5555-0952 - M5 Ø2 mm ruby ball, tungsten carbide stem, L 40 mm, ML 30 mm, for ZEISS applications
A-5555-0952 M5 Ø2 mm ruby ball, tungsten carbide stem, L 40 mm, ML 30 mm, for ZEISS applications M5 straight stylus, for ZEISS applications. Note: measurement length is to end of ball.

A-5555-0974 - M5 Ø4 mm ruby ball, tungsten carbide stem, L 30 mm, ML 20 mm, for ZEISS applications
A-5555-0974 M5 Ø4 mm ruby ball, tungsten carbide stem, L 30 mm, ML 20 mm, for ZEISS applications M5 straight stylus, for ZEISS applications. Note: measurement length is to end of ball.